6 Beneficial Oils for Natural Hair + Purposes

Hey guys! ❤ Naturacurls here with a list of great oils for natural hair, PLUS the purpose and benefits of it for hair. Note that this doesn’t go in any order.

Jojoba1

1. Jojoba Oil: Jojoba oil is unique because it closely resembles our own scalp’s natural sebum, which is awesome for scalp massages. It also works really well as a sealant after washing your hair or moisturizing to seal in the moisture. It strengthens hair follicles, and doesn’t interfere with your natural oils since it’s so close to it (psst water-only washing; learn more here). It’s also rich in Vitamins A, B1, B2, B6, and E. Finally, it promotes hair growth and is hypoallergenic. Now let’s just give jojoba oil a round of applause for all its great benefits! ❤

castoroil

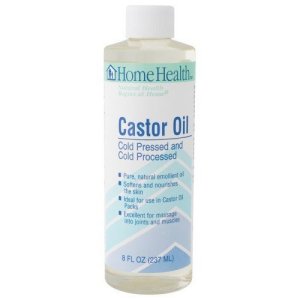
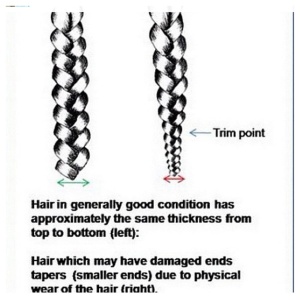
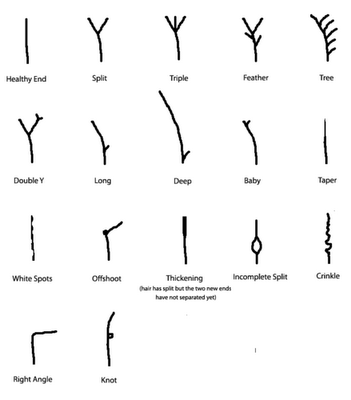
2. Castor Oil: Castor oil is a very thick oil that is commonly used on the ends to prevent split ends and on the scalp to improve circulation thus helping to grow hair. It also works really well as a sealant to keep all the moisture in your hair, and since it’s thick I’d recommend using it for high porosity hair since it tends to lose moisture quickly. It adds shine to your hair, reduces frizz, and helps reduce premature greying. It’s great to combine this with other oils for many benefits and to dilute it a bit. This oil gets an A+! 😉

bottle-of-avocado-essential-oil

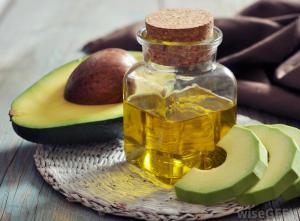
3. Avocado Oil: Avocado Oil is the opposite of Castor Oil in thickness. It’s a light oil that can be easily absorbed into the scalp, and is a great base for essential oils since it’s so light. So if it’s being absorbed what is being put on your scalp? Monounsaturated fatty acids, Vitamin E, and phytosterols, which together helps to nourish and protect your hair, stimulate growth, and unclog blocked follicles even! It revives hair that has been damaged in some sort (styling, relaxing, etc.) and is great for anyone prone to split ends and frizzy hair. Lastly, avocado oil helps to retain moisture, of course not applied alone, but to retain the water. DIY oil mixture for a relaxing hot oil treatment? Oh yeah.

coconut-oil-DSC_1718

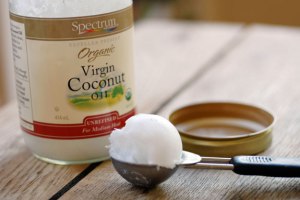
4. Coconut Oil: No list of oils is dare completed without the famous Coconut Oil, one of the most if not most popular and used oil for natural hair! Coconut Oil is one of the few oils that can penetrate deep into the hair strands making it an extra boost plus a light sealant when you moisturize with water. It’s rich in Vitamin E and helps reduce frizz, and prevents damage from hygral fatigue. A bit off topic but let me stop here and tell you what hygral fatigue is and a myth that really need to be busted:

Hygral fatigue is when you over-moisturize your hair. When you add water to your hair, the cuticles slightly lift up and the hair swells. Nothing bad, but if your cuticles keep going up and down and up and down from adding water too much everything gets messed up and your cuticles become damaged, plus when you stetch out shrunken hair it won’t shrink back up, and becomes weak, breaks easily, mushy and “soft” (not the good kind of soft). How much water you can put on your hair before it becomes damaged depends on the person’s hair, but I found out a lot of people still barely use water on their hair except wash days which is on average 5-14 days for most people. When I mist my hair 2 times a day people complain that I’ll get hygral fatigue. This not true. There’s a difference between lightly misting which might not even make the tiniest difference in cuticle raising, and constantly drenching your hair stretching cuticle to the maximum. Just had to say that. Plus, if you put water frequently into your hair like me (following Naptural85’s frequent washing theory watch video here) be sure to incorporate a polar oil (oils that protect from hygral fatigue eg: coconut oil, jojoba oil, olive oil, and avocado oil) to your regime. Everyone’s hair is different, so just in case.

DIY-Hair-Moisturizer-Olive-Oil_full_article_vertical

5. Olive Oil: Olive oil is an oil with a pretty middle-ground consistency, not light but not heavy either, and is another penetrative oil. It’s a great and loyal sealant to have to ensure moisture is kept into your hair, and helps with dandruff, itchy and dry scalps, and overall scalp health. It prevents hair loss and stimulates hair growth when massaged onto your scalp. So you have a great healthy scalp and an aid in hair growth! ❤

6. Canola Oil: The last and most uncommon oil on this list is canola oil/rapeseed oil! Didn’t see that coming, did you? 😉 Canola oil is a very inexpensive oil that you probably already have, that is a perfect carrier oil (oils to dilute essential oils) and hot oil treatment. Since it’s widely used in cooking a loottt are refined, so this was my emergency oil when there was no olive oil available. It’s nothing special, seals in moisture, lightweight. It does have nutrients such as vitamin E and omega 3 and 6, but you’d have to get a higher quality version (which I don’t have) to reap the benefits. It still gets a round of applause anyways! xD

So this wraps it all up. I might do a Part 2 of this, and maybe an essential oil version if you’d wish, but eh. I’ll think about it. Hope the info was helpful, and if there are any articles in general you would like me to do feel free to comment below 🙂 I certainly learned a lot of things from the many sources (The sources below aren’t even all of it) and now have a bit of a new love for researching.

~Naturacurls

SOURCES: http://blackhair.about.com/od/products/tp/10-Great-Oils-for-Black-Hair.htmhttp://blackgirllonghair.com/2011/11/8-herbs-oils-that-promote-hair-growth/http://www.naturalhairrules.com/10-oils-natural-hair/https://www.nenonatural.com/hair-blog/8-benefits-of-castor-oil-for-natural-hair-a-warninghttps://www.nenonatural.com/hair-blog/the-benefits-of-avocado-oil-on-natural-hairhttp://www.thenaturalhavenbloom.com/2012/08/does-your-hair-have-hygral-fatigue.html

ANNOUNCEMENT: Blogging Plan DEMO

Hey guys! So daily posting definitely isn’t working out for me like I thought it would. I do have a lot of time on my hands but not as much as I thought I had, figures. What, it lasted only 2 days? Major fail. So I figured out a blogging plan that would best fit my time. Plus I want to balance short and sweet articles, and long articles. I will plan on posting an article every Monday (starting tomorrow), Wednesday, and Friday, that should be just about right, since I’m not too far behind but by the time it’s late and I’m tired, I’m almost finished then end up posting a day ahead. But instead of getting too confident I’m going to test it out and see if it works, so bare with me. Sorry for this quite unprofessional announcement, but hey I’m really new at this blogging scheme and we all make mistakes. Returning back to writing the next post for tomorrow, stay tuned! ❤

Is Co-washing BAD for Natural Hair??

Hey there guys, Naturacurls here! So earlier morning, I read an article about co-washing causing shedding. I currently can’t get the source unfortunately.. 😦 It goes a little something like this:

hqdefault

“People co-wash with regular conditioner, which mostly is used to make hair more “soft”, the main purpose of putting conditioner in your hair. But if it makes the hair soft, it might also make the scalp soft as well, causing premature shedding. Some people say that scrubbing conditioner into your scalp gets rid of build up. It’s just one of those things that makes you go hmm..”

I find this particularly interesting.. but will have to disagree. I didn’t notice any more shedding, but I did notice that conditioner+ wide tooth combs are awesome at removing shed hairs. 😛 What do you think?

~Naturacurls♥

The Importance + Benefits of TRIMMING Natural hair: Trimming 101

Hey guys, Naturacurls here with a sweet article that will hopefully help you out. 🙂

So let’s talk about the topic of trimming! What scissor-happy naturals may love, and what others not so much..

-
-“What do you think when seeing these?”

Well love it or not, you’ll still need to trim. Well.. unless you want raggedy see-through ends.. hey, some find that attractive right?  Bottom line is, it doesn’t look healthy and is definitely not healthy. If you want to know how to properly trim natural hair, here’s a guide:

naturalhair chart

So now that you know why our ends over time thin out..

trimHere’s an example:

photo-10And here are all the nasties that will be mostly found at those thinning ends due to no protection:

tumblr_llhg0sZRRT1qcv9vp

This is what happens if you are stubborn to not trim at all to “retain” as much length as possible:

“Long hair but a waayyy too long overdue trim. I’m assuming the reason the ends are still there is because she probably gave some TLC to it but not trimming it. Goes to show that you can moisturize your ends all you want, if you don’t trim your ends then there’s no point in giving it TLC in the first place.

Plus for the people saying they never trim to “retain length”, your regimen must not be working for you because a trim isn’t the end of the world and should not interfere with length progress unless it’s a major one due to not enough TLC to your ends, just being blunt and honest. Also a note, please do not do the “dusting” method (where you cut off a very little amount of your ends) if you have a lot of see-through ends, because dusting isn’t made for that. It was made to keep your ends fresh and updated periodically with already for the most part healthy ends. Dusting ends that need a full-blown trim does basically almost nothing. Okay now let’s get the science-y facts and negativity away and show the benefits of trimming:

before and after trim natural hair

Benefits of trimming

1. More curl definition, emphasize on more because if you don’t already have curls you won’t suddenly get curl definition.. just for the people obsessed with that kind of stuff (and imo shouldn’t be, it isn’t really good). If you notice your hair getting more limp and less defined curls, that’s a sure sign that you need to grab those scissors and bring you hair back to life! ^_< There’s a really awesome difference of before and after trimming above from maneobjective.com.

2. Appearance of thicker hair- tapering ends can really affect your entire hair, one of them being making your hair look thinner. Along with a boost of curl definition you also get thicker and overall healthier looking hair, sweet! ❤

3. Better looking hairstyles- If almost every hairstyle you do without your ends being covered looks horrible or just not as great as before then that’s a pretty clear sign you need a trim, if you haven’t changed your regimen or anything. One simple trim is all it takes to turn a lifeless failed twist-out to a bomb twist-out!

And finally, who doesn’t love fresh blunt ends! Who cares if your hair is slightly shorter?

Hope this helped, and please be sure to share to anyone who is stubborn about trimming or just for some helpful info. For those who are scissor-happy.. keep your ends away from you via protective styling, lol. And don’t murder innocent ends.

Stay tuned for the next article coming up today! Yep, I’m doing 2 in one day! I started this article pretty late but was too tired to finish so I’m going to make it up. ^-^

~Naturacurls♥

What Has Been Making Your Natural Hair Journey EXPENSIVE? Part 2: Hair Tools

                                            
organic-beauty-talk-how-to-straighten-curly-hair-1024x768I’m pretty sure we’ve all watched videos of natural hair vloggers sharing their “Essential hair tools” which are definitely useful, but not essential, and might lead us to buy many hair tools at once, eager to try it out..

Only to be disappointed that it doesn’t work for your hair or frustrated and confused. You really don’t need those 20 items as your “essentials”. In this post I’m going to list the items in my opinion you’d need first to the least needed items.

MOST Needed to LEAST Needed Tools

Essentials: Detangler

denman-d3-brush1

You can easily start off with a comb, wide-tooth at that. Or as a free alternative use your own 10 fingers. What I do is finger detangle mostly, and if I want my hair to be thoroughly detangled I follow up with a wide-tooth comb. Using combs sparingly decreases breakage thus retaining more length and healthier looking hair.

download

Spray bottle

Yup, a spray bottle, for moisturizing your hair, which is just as important as a detangler. It’s very easy to find a reusable spray bottle within your household, otherwise you can find one at your local dollar store or at Sally’s. Their spray bottles have a nozzle for tightening/loosening if you want a mist, light mist, or stream.

satin-pillowcase-zippered-p

Satin/silk bonnet, scarf, or pillowcase

Because if not, you’ll wake up to super dry tangled hair. It’s super important to use a satin or silk bonnet/cap, scarf, or pillowcase because the smooth fabric doesn’t dry out our kinks and curls like cotton does.

83aeb9256a0c8c0d50f7f5135cfd208a

Plastic cap

For deep conditioning to trap heat into the hair and when you don’t want your hair wet while showering. You can buy a pack in bulk, no need for fancy plastic caps. You can find one at your local dollar store, beauty supply, or of course Amazon.

Recommended but not essential:

PSBBB

Brush: Great for smoothing hair, a boar bristle brush is recommended.

salon-care-butterfly-clamps

Butterfly clips/Duckbill clips: Great for sectioning and using a duckbill clip for sub-sections and pin curls. You can section without any tools by simply doing a bantu knot though.

08af7ab0cc89834b6fa5f8e2650250e6

Bobby pins + Scrunchies: So these are not essential but very close to it. You’d want a lot of quality bobby pins so they don’t snag at your hair. I have a 300-pack for $7 from Sally’s and they’ve been great so far. Scrunchies for of course putting up, and using the banding method to stretch. and try to get the ones without rubber bands inside, like Goody bands. If you want to know how to “band” your hair, Curly Nikki has an article that tells ways of stretching:

Banding

This method is great for stretching the hair without straightening it since it’s simple to do and doesn’t involve heat of any kind. All you will need are some small seamless hair bands.

  1. Start off by separating a small section of your hair and loosely securing the rest of your hair so that it does not get in the way.
  2. Then take your first hair band and secure it at the base of your hair.
  3. Take the next one and secure it around the same section about an inch above the first hair band.
  4. Continue to do this all the way to the end or leave about  2 inches of hair at the end to preserve the curl pattern if you are trying to stretch a wash and go or braid/twist-out.

It’s important to note that if you’re using this method to dry your hair or stretch it for a style like twists, then you should detangle first to remove any knots and ensure that the hair gets as stretched as it can. However, if you are using this method to stretch a wash and go or other style, then do not detangle before hand and try to do very little to manipulate the hair in order to maintain your curl pattern. Lastly, remember that the closer together the hair bands the more stretched the hair will be. Click here to read the full article

31PFsLc6SUL._SY300_

Rattail comb: Great for neat parting, and making comb coils (is that what it’s called?). I don’t have one but use the back of a paintbrush instead, works just as well.

images

Scarf/accessories: For those bad hair days or extreme weather cases, it’s great to have a decent amount of stylish scarves and/or beanies, but be sure to wear your satin/silk cap under a beanie so your hair doesn’t get dried out. Plus who doesn’t love a way to spice up your hair? I definitely recommend to invest in quality accessories. Like bobby pins, they can snag your hair and cause damage as well.

Upgrades

So these are the least needed and really in my opinion an upgrade to your hair care, and the most expensive. Funny how the most needed are the least expensive.. see? Natural hair isn’t as expensive as it’s dubbed to be. 🙂

dsc_0438

Curling Tool: These include perm rods, flexi rods, curlformers, roller sets, etc. There are other ways to make tool-less curls like bantu knot-outs and 3-strand twists. But as said these are upgrades and can give you each different curls.

sb-00605-2

Blow dryer/flat iron: You might already have this, but it’s still an upgrade. You can make a heat-less blowout but there’s no way to get your hair straight like a flat iron. Be sure to invest in a quality flat iron because you don’t want to mess with heat and heat damage is permanent.

425603_323347321037057_1174631541_n

Hooded dryer: You might want to get a hooded dryer to dry your hair faster and more gently than a blow dryer. Really useful if you want to make and set a style in one day.

hot-head-deep-conditioning-cap-review-deep-conditioning-demo-4c-natural-hair_712075 NOTE: I love Naturalme4c! ^^

Processing cap: These are caps to keep even more heat into your hair. You could just use a beanie or T-shirt/towel but if you want to get fancy and such (and there’s no problem with that, I’m just showing you inexpensive options :)] then it’s nice to have a cap specifically for deep conditioning (DC) treatments.

FINAL THOUGHTS: These are again, in my opinion what would be needed most to least, to help fellow naturals save money on their hair care, making it less stressful. This is the end of my little series, and hope the 2 parts will help you in you natural hair journey. Please feel free to share your thoughts, do you think the list was well-put? Would you add or change it? And what tools do you use? Thanks for reading and be sure to share to other kinky-coily-curly girls in need of saving money! I will try to make new posts everyday, or every other day at least so stay tuned! ^.^

~Naturacurls♥

DISCLAIMER: ALL SOURCES ARE FOUND BY CLICKING THE PHOTO. I DO NOT OWN ANY PHOTOGRAPHY OR CONTENT OTHER THAN MY OWN WRITING.

What Has Been Making Your Natural Hair Journey EXPENSIVE? Part 1: Hair Products

Hello to all, Naturacurls here with a burning desire to answer this question:

“Why is natural hair so expensive??”

maxresdefaultSource:https://www.youtube.com/watch?v=_JmVV6ZWaRc |This is a great video in which Naptural85 one of my favorite natural hair Youtubers explains on how natural hair doesn’t have to be expensive. Don’t worry the link goes to another tab/window. ^-^

And this statement:

“Caring for natural hair is too expensive… smh”

I do agree that providing the needs for natural hair can be expensive at some point, or all together, as with all things. In total everyone spends a lot on haircare needs, it’s no different to buying skincare products and make-up. You can make it as expensive or as cheap as you want to. Now that that’s out of the way, here are different routes to go from the cheapest regimen to most expensive (not unnecessarily expensive though) regimen. All are awesome and will benefit your hair, plus keep that money where it belongs; your wallet.

1. Most inexpensive option: Water-only Washing, or if you’re interested in natural hair abbreviations, “W.O.W”. Because it saves a ton of money! ^.^

Woman-washing-her-hair-0101Source:http://www.blackhairinformation.com/hair-care-2/shower-head-slowing-journey-healthy-natural-hair/

Some of you might know what W.O.W. is, some might not. But fear not I’ll explain! \(^-^)/ “W.O.W” is pretty self-explanatory, only washing with water, right? There’s much more to that. You start off with clarified and/or detoxed hair to remove everything, then as frequently as possible wash your hair with only water. Your hair will be dry at first because it’s not covered in your own sebum or butters and oils to moisturize, so the water won’t be sealed and will just wisp away.. 😦 But it will eventually bring the sebum down to the shaft of your hair, finally to the ends! ^.^ A lot of you may have thought that you have to wait and not wash often so the sebum can come down, but that’s a myth that has been busted  (By me of course.. ^.<) The reason sebum won’t fully coat our hair is because 1. We don’t wash often and 2. We use products that disturb the process. We also tend to have less sebum in general. The water, having it’s chance to shine will help spread the sebum to the shaft of your hair.

CONCLUSION: The sebum basically eliminates the need of sealing oils and butters, and water will be all you need to moisturize, PLUS hearing other people’s experience you retain much more length than you would with products.. sweet! That eliminates a majority of oils and creams. I personally don’t know a lot about W.O.W. myself nor do I plan to try it, but if you’re interested then feel free to research further and prepare to be relieved because you’ll be saving tons of money. 😉 Also please do share your progress, I’d love to learn about W.O.W. myself. 🙂

2. Middle-ground: Making your own hair products (Which is what I’m trying to do currently! 😀 I was actually inspired by Naptural85 who mostly makes her own hair products.)

diy-winter-natural-hair-mistSource:http://www.kinksarethenewpink.com/2014/01/moisturizing-mist-for-natural-hair.html

So this route has 2 roads you can go through, Road 1: Buying all ingredients needed at once or in bulk, which would be expensive at first you can imagine but pretty inexpensive in the long run, or Road 2: buying a few or one at a time. I’m going through Road 2! If you loovvee DIY (I’m beginning to.. lol a DIY newbie here!) this is perfect! And don’t worry, making products are easy. You just mix ingredients together! So no worries, it’s all good. I currently only have coconut oil as a new added feature (yes I JUST decided to buy coconut oil, I know), extra virgin olive oil (EVOO), and.. water? Other than that I have conditioner, barely-finished shampoo once I started co-washing pretty recently (YES.. pretty recently! xD), and aloe vera gel as just a gel, but it isn’t 100% aloe vera so afterwards it’s getting replaced with flaxseed gel) and I have had no problems so far. Really the only thing you’d need pre-made is a conditioner (cheap conditioner preferably to save the most money. Don’t underestimate one, most of the time they work just as well if not better than fancy ol’ conditioner. ^^)

3. Most expensive but easiest: What I like to call the “Mainstream Route” because most naturals fall into this category, Buying products!

hair-products2Source:http://enjoyingthejourneys.com/2010/11/24/natural-hairhair-productsjunkie-confession/

Let me start off with this: Here are a list of items which are all you really need.. of course you can buy extra if you’re willing to spend a bit of more money.

1. A Moisturizing (sulfate-free) shampoo and/or clarifying agent and moisturizing conditioner

2. A Leave-In Conditioner / Daily Moisturizer (Remember: It ISN’T a moisturizer if it doesn’t contain water high in the ingredients list (usually first or second)

3. Deep Conditioner

4. Sealant (A sealant is what seals in the moisture, AKA water the purest form of moisture. It includes oils and butters)

The most Most products you can buy are 6, and I’m guessing some of you want a gel as well for styling, which might make it 7 if you buy one but here’s what I suggest: Making your own clarifying agent (It’s like a “deep shampoo”. Moisturizing shampoos are just for casual cleansing as conditioners are casual, well, conditioners, if that makes sense.) and gel. Flaxseeds are super inexpensive and can be reused as well, and you only really need apple cider vinegar (ACV) and water to clarify (there are more ways) so I don’t find the point in buying a clarifying shampoo or gel. But if you still want to go through, feel free to. 🙂

Also, to make sure that you don’t have to go through hundreds of trial and error, learn NOT about your hair type (which is very overrated in my opinion) but about porosity, density, and strand thickness. Whether you hair is low, medium, or high porosity, high medium or low density, and if your strands are fine, medium or coarse. Those are what really helps you in making sure products work for your hair.. there’s no such thing as “What product works for my hair type?” Hair texture does have its place but in terms of finding products then not much.”

FINAL THOUGHTS: I believe the reason providing for your natural hair can be expensive for a lot of people is either because they’re falling into the hype of companies and unnecessary “needs”, or getting the exact same items as your favorite vlogger/blogger and being disappointed, very common reasons being that she’s your “hair crush” or having the same hair type as you, in which like I said before hair typing and hair texture does have its place, but not with products. Also not taking the time to actually learn about your hair, and EXPERIMENTING, RESEARCHING about qualities of your porosity, density, and strand thickness, and realizing this isn’t the end-all-be-all of being natural. Store-bought hair products may be the mainstream around our community but there are amazing and dreadfully underrated options out there, even more than what I provided!

For DIY hair products, buying 100% real ingredients gives best results, and if you decide to try the first 2 and make better choices with the third route, please feel free to share your progress and comment down any questions, comments, or concerns. I’d love to hear from all of you! ^_^

TYSM for reading and part 2: Hair tools is coming up next so stay tuned!

                              ~Naturacurls♥